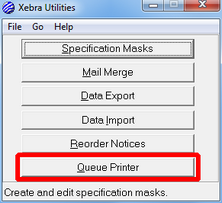
Most of the options available in Utilities are specific to operator types and will be covered in the appropriate sections to follow; however, one option may be relevant to all operator types. We have talked about the Printer Queue earlier in this segment and touched upon its use and how to initiate it. Now we will discuss how to operate the Queue itself.
Using the Go menu, navigate to Utilities.

| • | Queue Printer – Click on Queue Printer to bring up the Queue dialog. |
| o | Document Types – All available document types are listed. Any types with documents waiting in the queue will be prefaced by an asterisk. You may flag any type for which you want to view or process the waiting documents. |
| o | Document List Box – The lower half of this dialog will show all waiting documents relevant to the type you have flagged above. All documents will be listed with the date and time the document entered the Queue, the Operator who initially created the document and, once it has been printed, the date and time it was printed from the Queue. Each document is also, by default, listed with an X noting they have been selected for printing. To change this, double-click on the document and uncheck the “selected for printing” option. You may also at this time change the document description, choose to view the document or delete the document from the Queue. |
| o | View Menu – |
| ▪ | All Entries – By default, the Queue Printer only displays queued documents that have not been printed. If you select All Entries, all queued documents will be displayed. |
![]()
| ▪ | Refresh - Will refresh the list of queued documents so that it reflects any new documents added to the queue since you first loaded the list. |
![]()
| o | Commands Menu – |
| ▪ | Print – Prints all documents chosen in the list box. Once initiated, the system will ask that you confirm the documents have printed before proceeding. |
![]()
Before proceeding on to more operator specific sections of this manual, you are encouraged to review this Xebra introduction again. There are many features discussed in this section that you will encounter throughout the system and the more familiar you are with them the smoother you can expect the remaining segments to go. When you are confident that you are ready, continue on.