The chart of accounts supplied with XETEX Xebra will meet the needs of most distributorships. It may be necessary to add a few accounts to meet special needs. If this is done within the structure provided, it is quite easy. You may also want to change the name of some of the accounts to match your taste. With the supplied chart of accounts, the setup work is done for you and you can move forward with learning the software.
Major changes to the chart of accounts must be made before any job data is entered!
While we recommend that you use the chart of accounts provided, you may certainly change the chart of accounts. If you wish, you may delete the chart of accounts provided and create your own from scratch. In making your decision, remember that Xebra does not require operators to enter general ledger account numbers very often. If the only reason that you want to change the chart of accounts is so that your operators won’t have to learn new codes, you should reconsider your decision.
There is no problem with adding new accounts or changing the totaling after you start. Deleting and changing account numbers that already have postings is difficult.
If the changes you are planning are extensive, you may wish to delete the existing chart of accounts and start fresh. Setup>Options>Zero GL Chart will delete the chart of accounts. This requires a password that must be obtained by contacting XETEX Customer Support by telephone when you are ready to delete.
Chart of Accounts
The chart of accounts is built like an outline.
I. Assets
A. Cash in Banks
1. Checking Account
2. Savings Account
3. Payroll Account
B. Inventory
1. Customer Specific Inventory
2. General Stock
Account Class
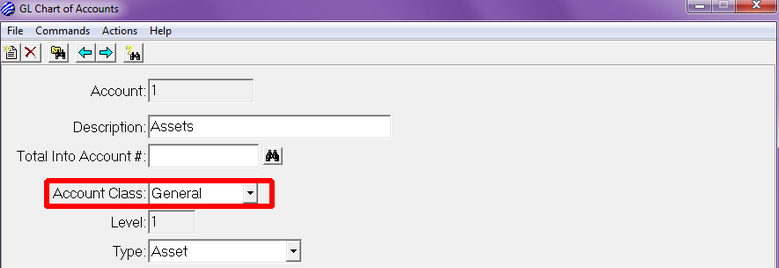
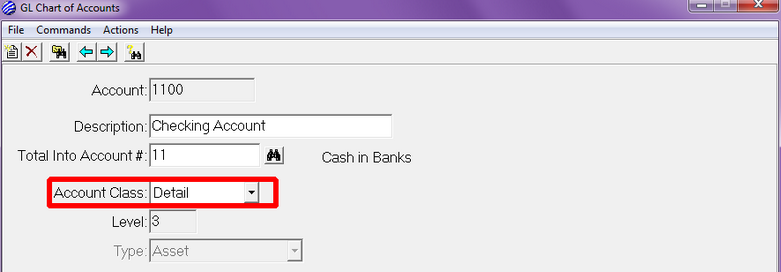
All but the lowest level in the outline are General Accounts. They hold totals of all of the accounts beneath them in the outline. The lowest level accounts in the outline are Detail Accounts. Only Detail Accounts can receive posting directly. Transactions cannot post directly to general accounts.
Total Into Account # and Level
The entry window and documentation will refer to Level in dealing with accounts. In the outline above, Assets is a level 1 account, Cash in Banks and Inventory are level 2 accounts. The rest are level 3 accounts. You do not need to stop with level 3, you may have up to 5 levels. Except for Level 1 accounts, XETEX Xebra keeps track of the levels for you. As new accounts are entered, you will be asked what account you want the new account to total into. The system will determine the level of the new account based on the level of the account that it totals into.
Level 1 Accounts
To enter a level 1 account, leave the Total Into Account # blank. There should be 5 and only 5 level 1 accounts. They should be ASSETS, LIABILITIES, EQUITY, REVENUE, and EXPENSE. On level 1 accounts, you will be prompted for the account type where you have the choice of Assets, Liabilities, Equity, Revenue, or Expense.
GL Number Conventions
On the supplied chart of accounts, level 1 accounts are 1 character (1,2,3,4, and 5). Level 2 accounts are two characters. Level 3 general accounts are 3 characters. Detail Accounts are 4 characters regardless of the level. These are conventions only. Account numbers may be any length.


NOTE: If you need to supply a printed copy of your chart of accounts to your accountant: GO > Accounting > Ledger > GL Chart of Accounts > Actions > Print Chart > OK