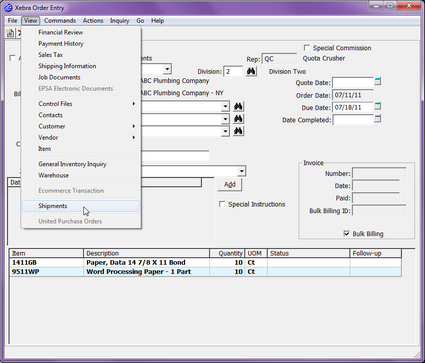
Shipments can be accessed from the View menu on the main Order Entry screen;
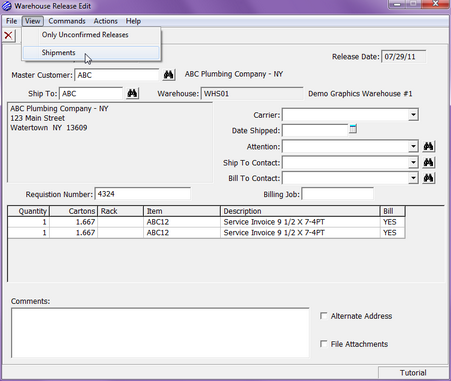
or the View menu in GO > Customer Specific Inventory > Actions > Release Edit/Track.
The Shipments screen will allow you to create shipments for a job or release. It will also display the pertinent shipping details once the shipment has been processed. To setup a shipment, we must first have a job or release to connect it to. We have created a job with 2 line items on it. The first line item has a Xebra item code of 1411GB and will be shipped to the address on the customer shipping record. The second line item has a Xebra item code of 9511WP, which has an alternate address associated with it.
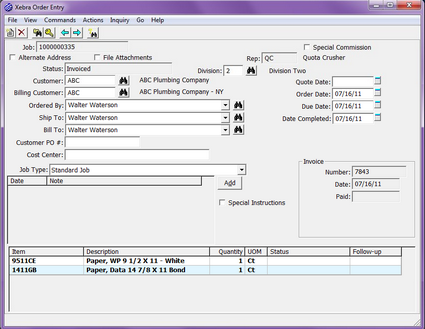
From Order Entry, click on View > Shipments. This will show you every shipment on a job or release. A shipment for the line item 1411GB has already been processed and appears on the Shipments screen below. Double-Click on the shipment in the list to access the shipment information.

Notice that the item at the bottom of the screen has an “X” in front of it. This means the item has already been linked to a shipment and cannot be selected for any other shipment. Click on the Shipment Details button at the bottom of the screen.
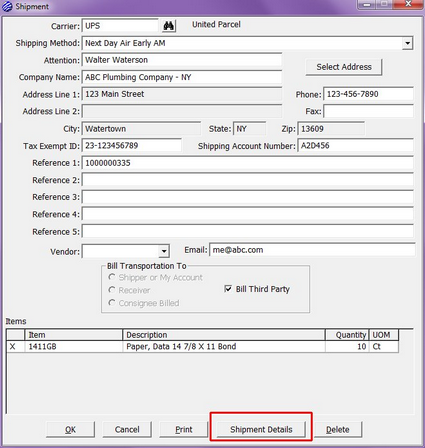
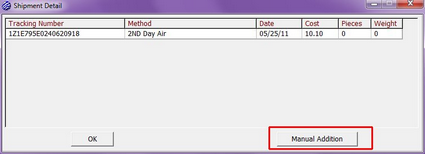
This allows you to see shipment-related details. If your Xebra is integrated with a third party shipping software, this information will be imported into Xebra after the shipments are processed. If your system is not integrated, this screen would be blank until you add the information manually. Click on the Manual Addition button at the bottom of the screen.
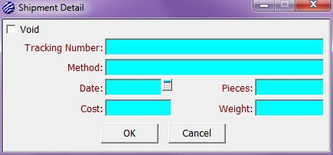
Here is where you would enter the shipment details manually.
Close out of this screen, and return to the main Shipments screen as seen below.
We are going to create a new shipment for the remaining item on this job. Click on the “New” button.

The Carrier, Shipping Method, Attention, Company Name, Phone, Fax, Tax Exempt ID, Shipping Account Number, and Email fields are filled in with information pulled directly from the Job, the Customer Shipping record, and the Shipping Instructions record. The Reference 1 field is filled in with the Customer PO#, Requisition #, or Release ID # from the job. If none of these are provided on the job, the field will be filled in with the Job #.
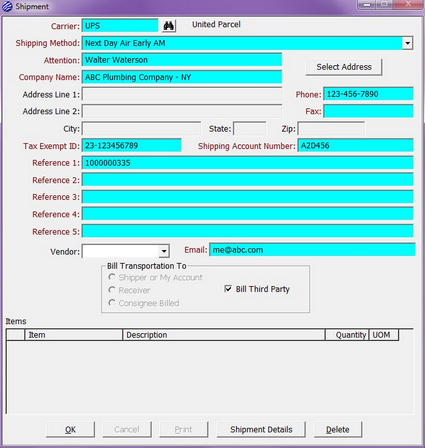
Notice that the Bill Third Party check box is checked in the Bill Transportation To section of the screen. This is defaulted from information on the Customer Billing record. This setting informs your shipping software that the customer will be billed instead of your company. The picture of the Customer Billing screen below shows you where to find this setting.
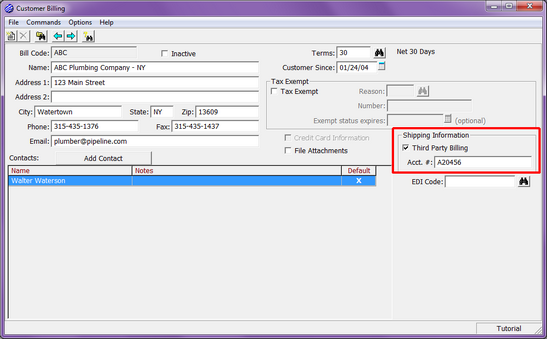
If you want to use the Shipping Account Number on a shipment instead of the third party billing information, then you would only fill in the Acct. #, and leave the Third Party Billing check box unchecked. If you would like to choose one of the other Bill Transportation To choices (Shipper or My Account, Receiver, and Consignee Billed) on the Shipment screen, uncheck the Bill Third Party checkbox.
Let’s continue setting up the shipment for the second line item on the job. You will see that no address information and no line items are present.
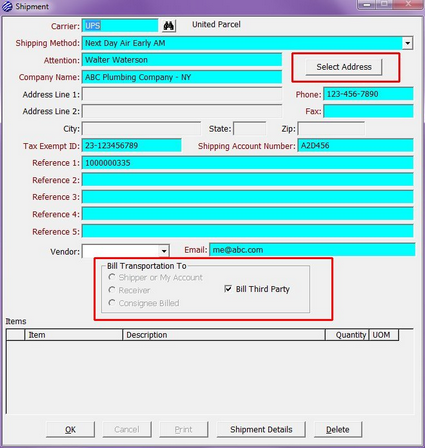
Because there is more than 1 shipping address associated with this job, we will have to click on the “Select Address” button to select the one we want. The second line item on this job has an alternate address, so we need to select which address we would like to use. From the Select Shipping Address screen, double-click on the Waterford, PA address.

The address information has been filled in based on our selection.
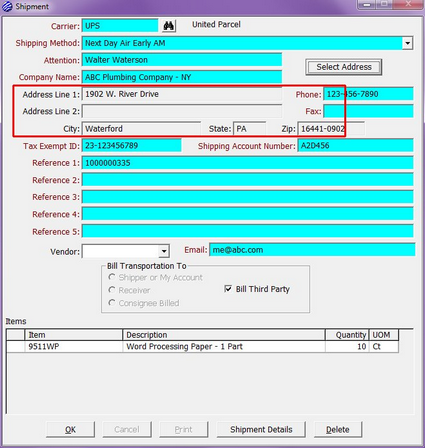
Now that we have selected an address, the Items list at the bottom of the screen has been filled in with the line item associated with it.
In order to connect the line item to this shipment, double-click on the item. An “X” will appear to the left of the Item field. This prevents the item from being connected to any other shipments. Once an item has been connected to a shipment, the Print button becomes available.
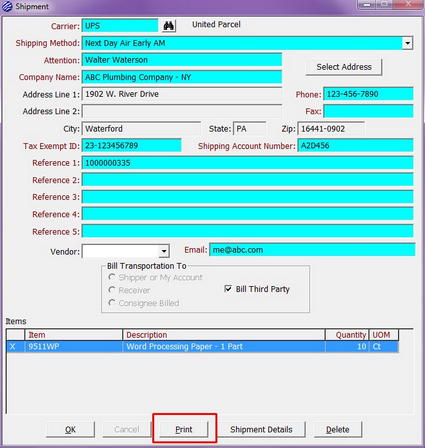
Click on the Print button. Verify the information on the Packing Slip screen, and click OK.
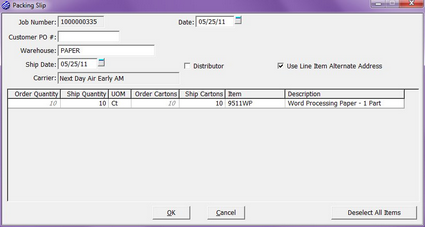
Only the item associated with this shipment will appear on the Packing Slip or Release document.
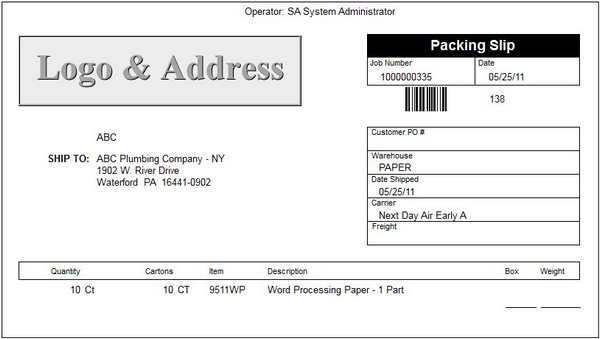
The bar code and Shipping ID number to the right of it have been added to allow your third party shipping software to easily grab shipment information from the Xebra without having to retype the information. The number represents the information that is encoded in the bar code, and the number 138 is the unique id that represents this Xebra shipment. That number will be used in the third party shipping software should you choose to integrate with one.