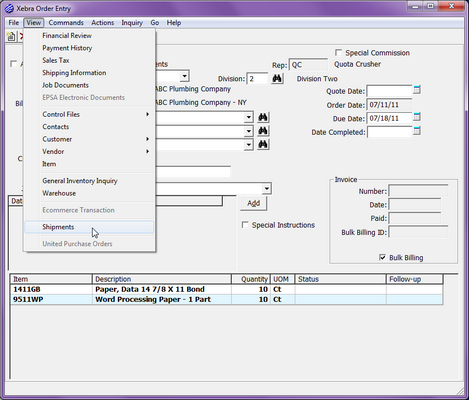
Shipments are accessible in the Xebra through the Order Entry screen for jobs and the Release Edit / Track screen for Customer Specific Inventory releases.
There is 1 step that is required to ease the process of using shipments. We must setup our shipping vendors and their available service types.
GO > Order Entry > View > Control Files > Shipping Instructions

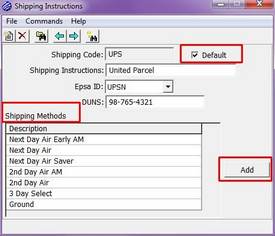
The Shipping Instructions table requires a unique Shipping Code for the vendor and all of the service types offered. We are going to create a new shipping vendor with a code of UPS.
From the Shipping Instructions screen:
| • | Click on Commands > New |
| • | Enter UPS as the Shipping Code |
| • | Enter United Parcel in the Shipping Instructions field. |
| • | Leave the Epsa ID and DUNS fields blank if they do not pertain to you. |
| • | Click on the Add button to add your service types. As they are entered, you will see them populate in the Shipping Methods section of your screen. If you are integrating with a third party shipping software, you must enter them exactly as they are represented in that software. |
| • | Click on the Default checkbox if you would like all new shipments to default to this carrier. Otherwise, do not check it. |

To Edit or Delete any of the service types listed, double-click on the item, and click on the Edit Button or the Delete button.
You will need to create a record for each of your shipping vendors (UPS, FedEx, DHL, etc.) that you utilize routinely. Only 1 shipping vendor record can be designated as your Default carrier.
We are now ready to discuss how to create and manage shipments on jobs and releases.