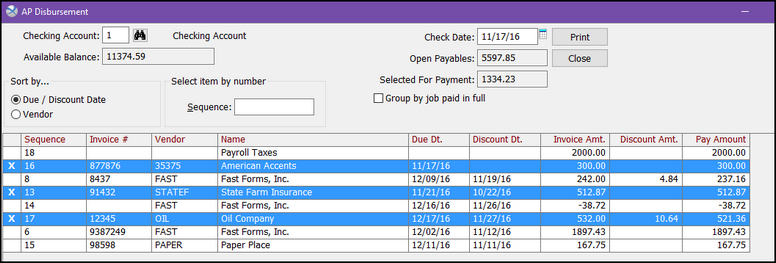
Select Payables > AP Disbursement from the Accounting Node.
All existing payables will appear, along with the account you will be writing checks from. Verify the account and change it if necessary. The list box shows all of the outstanding payables listed in order of the Discount Date or Due Date, depending on the expiration of the Discount Date.
![]()
Go through the following exercise to select items for payment.
Note: You must complete the AP Entry section above before beginning this section.
On the Disbursement window, <Tab> to accept the current date as the Check Date.
double-click on the line with Sequence Number 8.
Close the Select for Payment dialog box by clicking OK.
Note that Sequence Number 8 has now been selected for payment. Selected for Payment shows the total amount of the items that have been selected.
While holding down the <Ctrl> key, click on sequence numbers 13, 16 and 17. Press the <Enter> key to select those items for payment.

![]()
NOTE: If you have to close this screen before you are able to print the checks, your current selections will be saved. When you return to AP Disbursements, you will see the following message: "An unfinished AP Disbursements session has been found. Do you want to restore that session?" Click Yes.