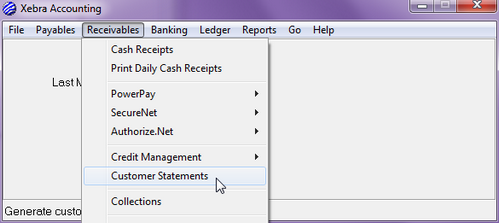
Go > Accounting > Receivables > Customer Statements


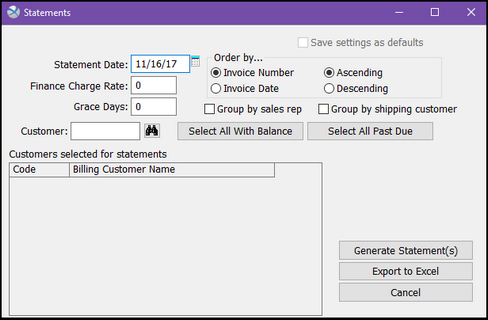
The Statement Date defaults to your computer's current system date, but you could change it if you need to.
Some companies want to display finance charges on the statement document for past due invoices to emphasize the importance of paying before the invoice due date. If you want to display finance charges on your statement, enter a rate (as a percentage without the % sign) in the Finance Charge Rate prompt. If you don't want to display finance charges for past due invoices unless they are a certain number of days past due, you can enter this number of days in the Grace Days prompt. The Grace Days value only affects whether or not finance charges will show for an invoice. The Grace Days value has no effect on the due date calculation for invoices or whether invoices will be marked on the statement document as past due. Also, keep in mind that the finance charges are for display only. Accounts receivable entries will not be generated in the system when you run a statement that shows finance charges. If a customer pays a finance charge along with the payment for a past due invoice, you can accept the finance charge amount at the time of cash receipts. If the customer pays a past due invoice but refuses to pay the finance charge, you won't have to write off the finance charge.
You can sort the statements by Invoice Number or Invoice Date, in either ascending or descending order. In addition, you can also select the Group by sales rep or Group by shipping customer checkboxes. If the sorting options you've selected are the same each time you run your statements, you can save those settings by clicking on the Save settings as defaults checkbox.
You can run statements by the following:
| • | Select All With Balance |
| • | Select All Past Due |
| • | Entering a Customer code in the Customer field - you must hit the Enter key on your keyboard for the customer to appear in the Customers selected for statements box. |
If you would like to remove any customers from the Customers selected for statements box, simply double-click on the customer. A prompt will ask if you want to remove the billing customer from the list. Click Yes.
When you click the Generate Statement(s) button, you will either accept the default document configuration or select another one, click OK, and the statement document will be generated and displayed in the Xebra Print Preview window. The asterisks * next to the due dates indicate which invoices are past due.
When you click on the Export to Excel button, Excel will open and display your statements. Each customer will have their own tab across the bottom of the screen.