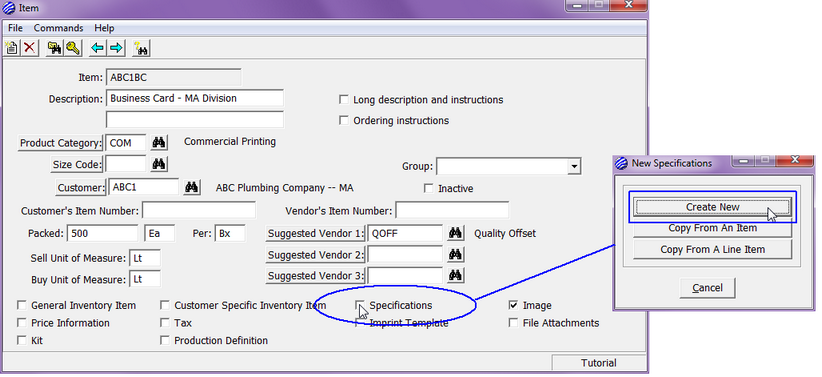
From Order Entry, select View > Item.
Select Commands > Find.
Enter ABC1BC for the Item Number and select OK.
From the Item dialog select the Specifications option and from the New Specifications dialog select Create New.

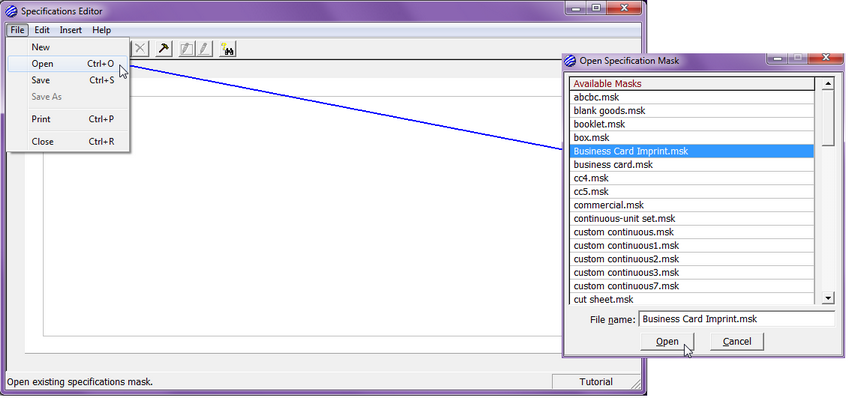
You are now in the Specifications Editor. Use File > Open to open the library of existing masks and double-click on the mask we’ve just created; Business Card Imprint.msk.

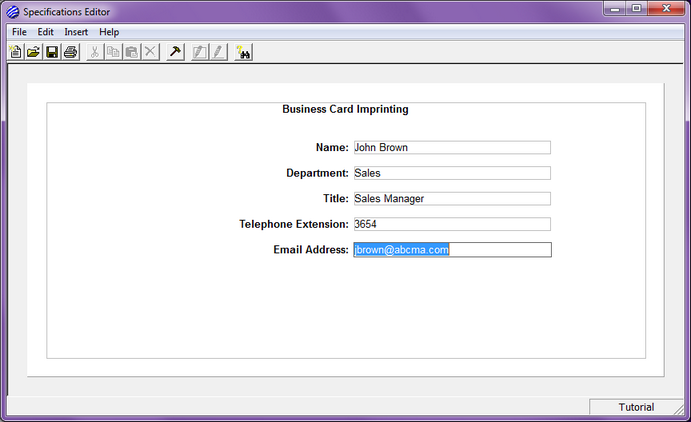
You will now see the mask we have created for business card imprinting. You will notice the look of this mask is slightly different than before. When we were initially creating this mask, we were in the design mode hence the presence of the grid. Now we are concerned with data entry. You will now be prompted for data based on the entry order you established when creating the mask.
In the Name prompt enter John Brown and Tab.
The drop down list we created is now highlighted. Notice Sales is already entered because we made it the default department. Clicking on the drop down list will expose all other options you may have provided or, if you chose to allow editing, the user could manually enter a department title as they like. For this exercise, select Sales and Tab.
For Title enter Sales Manager.
For Extension enter 3654.
Finally, for Email enter jbrown@abcma.com
You’re finished mask should look as follows:

Once complete, close the Specifications Editor and answer Yes when prompted to save the mask.