|
The mechanics of closing the year are quite simple. There are, however, a lot of non-mechanical concerns that must be considered. Like the month-end close, the year-end close procedures are designed to encourage ensuring accuracy. Typically, it takes company quite a while to completely finalize the year’s accounting and usually involves an outside accountant. The suggested procedures that follow combine the mechanics along with operational considerations. The following expects all 12 months of the year to have been closed and locked in the General Ledger. The Beginning Balance and Year End Adjustments periods should be locked as well. If any periods have no data present, it cannot be locked nor does it need to be in order to close the year. If the Month End Procedures have been properly done for all 12 months, errors will be few and far between.
| 1. | Review the accuracy of your year-end balance sheet and income statement. |
| • | Review the ‘G/L Data Import Status’ from the General Ledger main window to confirm that all 14 periods are locked. |
| o | Under normal circumstances, the Year End Adjustment Period will be empty. |
| o | If there are periods that are not locked, lock them. |
| o | If there are potential error conditions detected, they should be resolved before you continue. |
| • | Run your income statement/balance sheet through month 12, selecting the option to include year end adjustments. |
| o | On the print preview, check to make sure the report title says *Balance Sheet*. |
| • | Review the Balance Sheet using the “Reviewing the Balance Sheet and Income Statement” procedure. If corrections are made, repeat Step 1. |
| • | Once you are satisfied that the Balance Sheet and Income Statement are ready to go to your accountant to prepare taxes, you are ready to do the preliminary year end close. |
| 2. | Release information to your accountant for tax preparation. |
| 3. | Preliminary Year End Close – This step is to create temporary beginning balances for the current year while you are waiting for your accountant to provide year end adjustments that may be required. While the beginning balances will be changed when your accountant is finished, the cash accounts, accounts payable, and accounts receivable balances should be accurate. These accounts will allow you to verify and close the first months of the new year. |
| • | Make sure that your last month closed on the accounting node is set to the last month of the year or later. |
| • | Select Ledger > Commands > Year End Close |
| • | Provide your retained earnings account and the year being closed, if they have not defaulted. |
| • | Select OK and the program will close the year and populate the beginning balance period for the current year. |
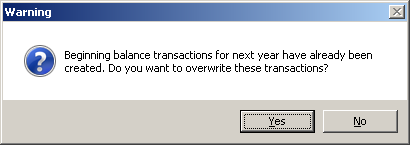
| • | If there is data already present in the beginning balances period for the following year, you will receive a warning message. The YES option will overwrite all of the information with the results of the close. |
| 4. | Year End Adjustments – When your accountant provides you with adjusting entries for the year use the following procedure to replace the beginning balances for the new year. There is no need to do anything with the months of the new year that you have already closed. If you maintain monthly hard copies of your balance sheet and income statement, however, they will change as a result of changing the beginning balances. |
| • | Open the Year End Adjustments Period for the year you are closing and unlock it. |
| • | Select Actions > Manual Entries and enter the adjustments provided by your accountant. When you are finished, select OK. You will not be permitted to exit until the transactions entered balance. |
| • | Lock the Year End Adjustments Period. |
| 5. | Review the Balance Sheet and Income Statement. |
| 6. | Final Year End Close – Repeat the procedures in Step 3 to replace the beginning balances for the current year with updated figures. |
When performing the Year End Close, if there are already beginning balances for the next year, you will get the following message:

Choose Yes to overwrite the preliminary beginning balances.
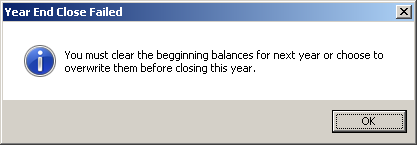
If you choose NO, you will get the following message:

Select OK to continue.
|

