One of the most common actions to take in an effort to collect on past due invoices is to send a customer a statement document. Xebra Collections offers a new way to handle sending statements.
From the Customer Collections window, choose Actions > Generate Statement from the menu.

This will open the Generate Customer Statement window.
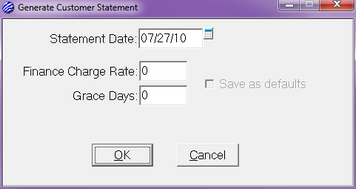
The Statement Date defaults to your computer's current system date, but you could change it if you need to.
Some companies want to display finance charges on the statement document for past due invoices to emphasize the importance of paying before the invoice due date. If you want to display finance charges on your statement, enter a rate (as a percentage without the % sign) in the Finance Charge Rate prompt. If you don't want to display finance charges for past due invoices unless they are a certain number of days past due, you can enter this number of days in the Grace Days prompt. The Grace Days value only affects whether or not finance charges will show for an invoice. The Grace Days value has no affect on the due date calculation for invoices or whether invoices will be marked on the statement document as past due. Also, keep in mind that the finance charges are for display only. Accounts receivable entries will not be generated in the system when you run a statement that shows finance charges. If a customer pays a finance charge along with the payment for a past due invoice, you can accept the finance charge amount at the time of cash receipts. If the customer pays a past due invoice but refuses to pay the finance charge, you won't have to write off the finance charge.
When you click the OK button on the Generate Customer Statement window, the statement document will be generated and displayed in the Xebra Print Preview window. The asterisks * next to the due dates indicate which invoices are past due.
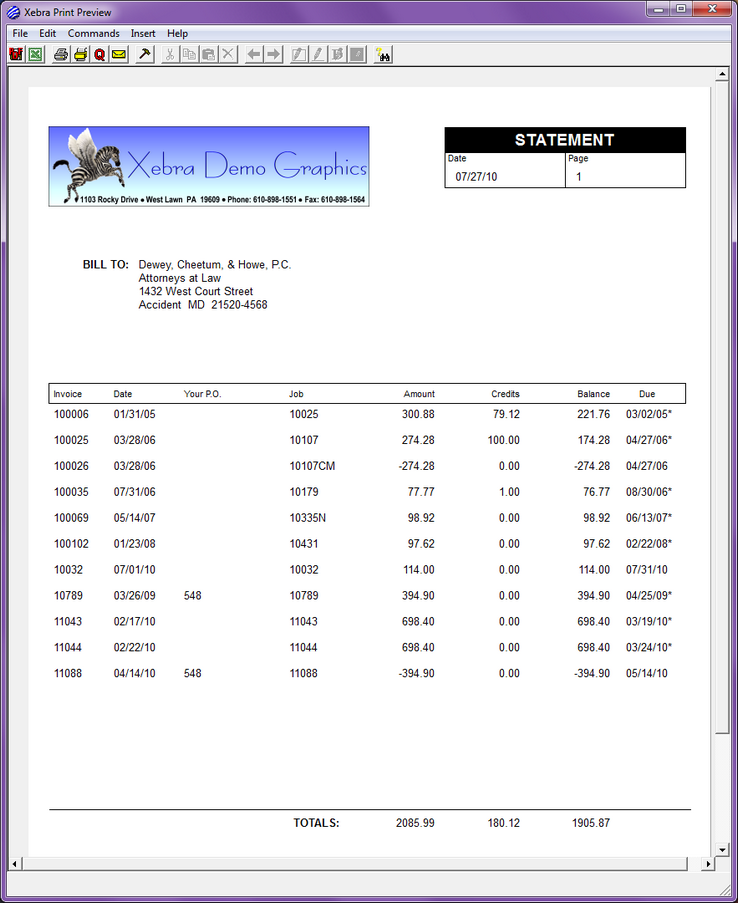
Once you have the statement document loaded in Xebra Print Preview, you could take advantage of Print Preview's design mode to add a special note to the statement. Choose Edit > Design Mode from the menu or click the hammer on the tool bar.

Choose Insert > Text Field from the menu or click the tool bar button.

Draw a box for the note wherever you want it to appear in the document.
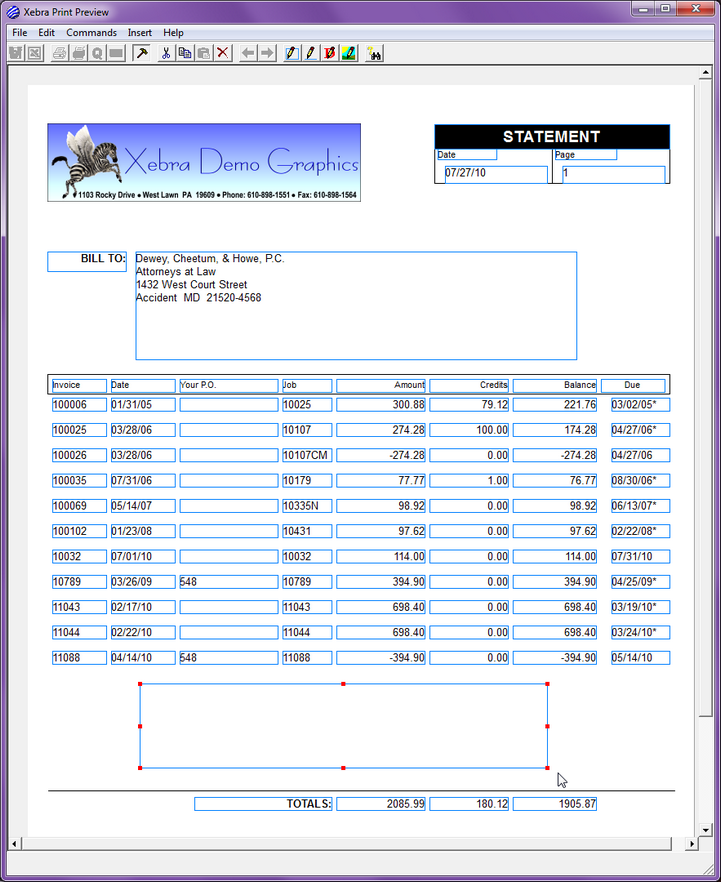
Double-click the new box to open the Data Field Properties dialog where you can enter the text of the note and change the color and font to be used for the text along with other formatting options.
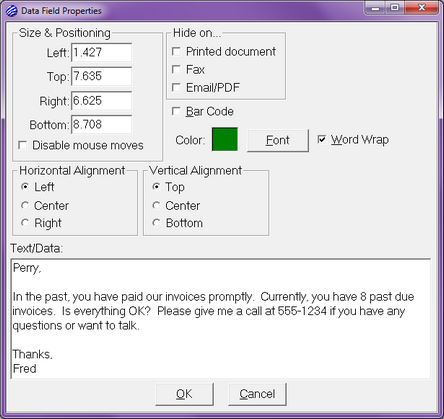
After you hit OK on the Data Field Properties window, turn off design mode (Edit > Design Mode or click the hammer again), and save the changes, the statement with the note might look like this.
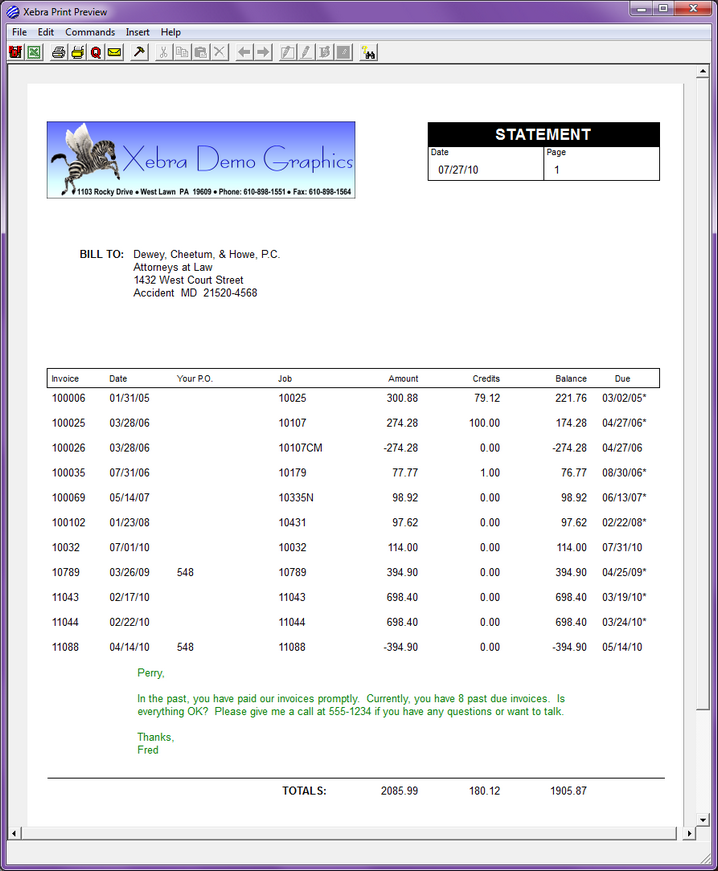
The Xebra Print Preview window provides you with several options for sending the statement document to your customer.
You could print the statement immediately to send it in the mail.

You could fax the statement using your fax software.

You could queue the statement so that it can be printed later along with other statement documents that need to be mailed.

Or, you could email the statement to your customer as a PDF attachment.

When you close the Xebra Print Preview window, the Add Collection History Note window prompts you to enter a note to record what you did. The note defaults to simply "Statement sent" but you may want to change it to describe exactly what you did.
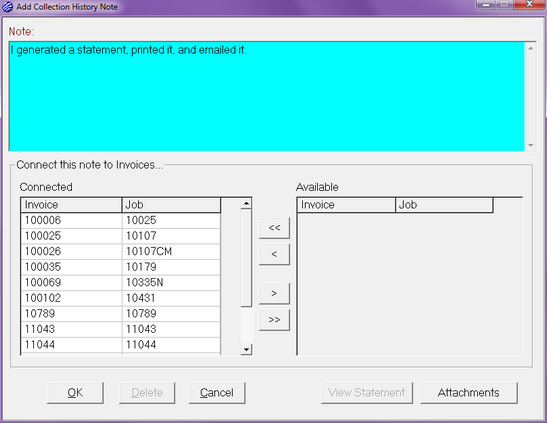
The section, Connect this note to Invoices..., indicates that all of the open invoices are connected to this history note. When you record a note after generating a customer collections statement, each invoice that appeared on the statement is connected to the note by default. You can move the invoices back and forth between the Connected and Available list by double-clicking them or using the buttons between the two lists. Being able to connect a note to invoices makes it possible to look at old history notes and see exactly which invoices were involved at the time the note was generated. You can also optionally print history notes on the Receivable Aging report. The note would appear along with each invoice that it is connected to.
After you hit the OK button on the Add Collection History Note window, the note is saved and it appears in the Customer Collections History list.

The asterisk * next to the history note entry indicates that something is attached to this note. In this case, it is the statement document that is attached to the note. If you double-click the note entry and re-open the Add Collection History Note window, you will see a View Statement button. This is one way to view an old statement document that you generated through Xebra Collections.
Another way to view past statements would be to select View > Statement History from the Customer Collections menu.
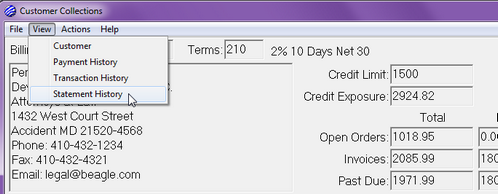
This will open the View Customer Statement History window which will list all of the statement document that were generated for the customer, the date that they were generated, and the name of the operator who generated them.
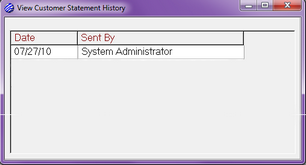
To view an old statement document, highlight an entry and press the Enter key on your keyboard or double-click an entry.
If you need to delete a statement from history, you can highlight the entry in the list and press the Delete key on your keyboard.