There are many reasons you would want to schedule a prospect or, especially, a group of prospects to receive a mailing. Regardless of the purpose, the Next Mail feature will allow you to easily assign a prospect record to a scheduled mailing and create a mailing list of all scheduled recipients when you are ready to execute. As a simple example, let us create a scheduled mailing for just two of our prospect records.
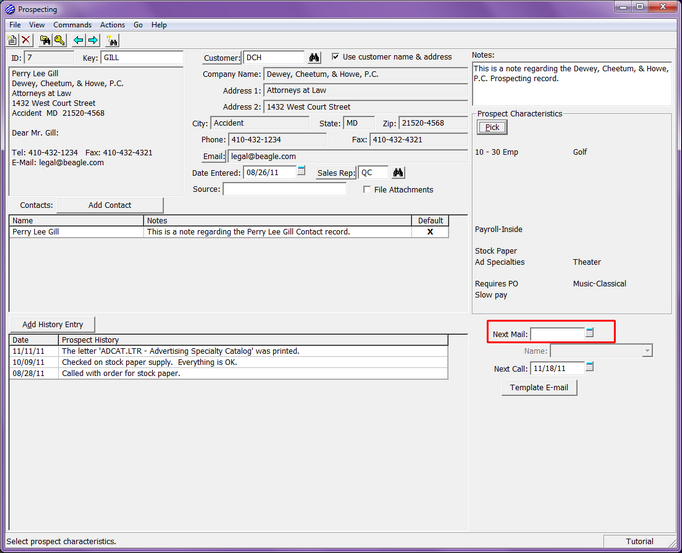
First, we will need to assign a mailing to the future recipients. Find the prospect GILL.

Locate the Next Mail field in the lower right corner of the dialog (above the Next Call field). Enter T for today and Tab. The Name field immediately to the right will become active and we must now assign a specific mailing. As this is a new mailing we are creating, you will notice there are no entries in the drop down box. Manually enter: DEMO LETTER.
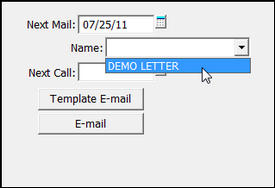
Now, find the record for PIPES. Once loaded into the dialog, set the Next Mail date to today’s date. Clicking the drop down box for Name you will now see DEMO LETTER as an option. Simply click to choose this mailing.

NOTE: It is very important to use an existing mailing title when present as the slightest difference in entry will cause Xebra to recognize them as completely separate mailings.
Now that we have established our recipients, we can move forward to exporting the mailing list.
From Prospecting > Actions > Scheduled Mailing

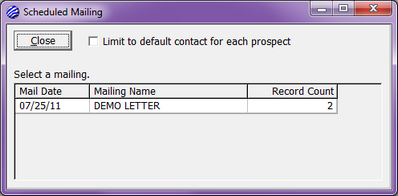
The Scheduled Mailing dialog will show all mailings existing in Prospecting. In this example, there should be just the mailing we created a moment ago.
NOTE: There is a checkbox labeled “Limit to default contact for each prospect”. This will list only the default contact for a selected prospect, if there is a default contact for that prospect. If there is no default contact, and there are multiple contacts for the prospect, it will generate a separate row in the export for each contact, just as if this check box was unchecked. This check box should be unchecked by default.
To continue, double-click on the DEMO LETTER mailing.

In the Scheduled Mailing Review, we have the opportunity to review the records and details that will be exported. We also now have the ability to create a Report which will give us a printed copy of all represented data or to Export the data we have gathered into a computer file. At this time, select Export.
The standard Windows Save dialog will appear with the name of the export file defaulting to the name of the mailing with the extension .txt. The directory for the file defaults to the Export directory within your Xebra client path though you may change this if desired. Select Save to save the file to your workstation and return to the Scheduled Mailing Review dialog.
NOTE: Xetex Xebra does not actually create and print the mailing. You will need to use mail merge enabled word processing software (i.e. Microsoft Word) to create the mailings and print them. The export file that the Xebra creates will be the data source for the mail merge.
Now that you are back in the Scheduled Mailing Review dialog, select the Add History option.

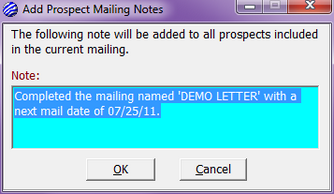
The default note states that the mailing has actually been completed. In this case, we just want to add notes indicating that the data for the mailing has been prepared.
Change the note text to read: Prepared the DEMO LETTER.txt file for mailing.
Select OK.
Close the Scheduled Mailing Review dialog.
Close the Scheduled Mailing dialog.
Load the prospect GILL if is not already loaded. You will see the prospect note that you just added at the top of the Notes list. The same note will appear in the prospect record for PIPES.
Let us now assume that we have created the mailing using the file we have just exported and completed the printing. Everything went well and the mailing is on its way.
Go to Prospecting > Actions > Scheduled Mailing
Double-click the mailing DEMO LETTER as we you did before. Now, select Add History and accept the default note at this time. In this example, we have added two notes for one mailing; however, it is entirely up to you how specific your history needs to be. Once complete, select Clear Mailing. There will be a system warning message that appears. This message is cautionary and asks you to confirm that you do in fact want to remove the Next Mail Date and Scheduled Mailing for each of the Prospects included in the export. Select Yes.
The Scheduled Mailing Review will automatically close because the mailing is now gone. The Scheduled Mailing dialog indicates this by displaying an empty mailing list.
You can now close and return to Prospecting.