This is a new feature in the Xebra, which allows you to enter, store, and manage your contact information in much more detail. In Contacts, the information entered is directly related to the individual contact, rather than the customer, vendor, or prospecting records they may be associated with. Once a contact is created, they can easily be linked right from the Contacts screen to any of the records we just mentioned, without having to re-enter the information.
If you would like to have only 1 Customer Shipping record, with multiple contacts attached to that single record, then this tool will allow you to do that.
GO > Order Entry > View > Contacts.
Click on Commands > New
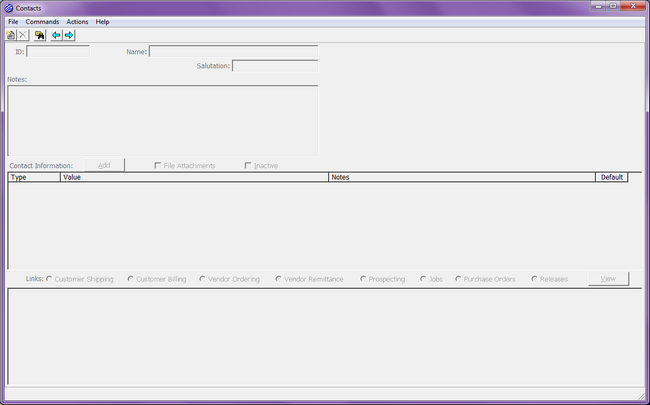
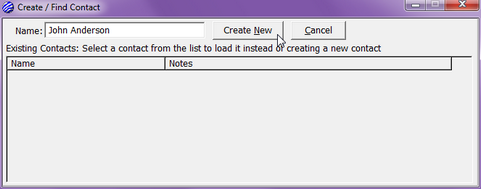
Enter a name in the Name field, and click on the Create New button.
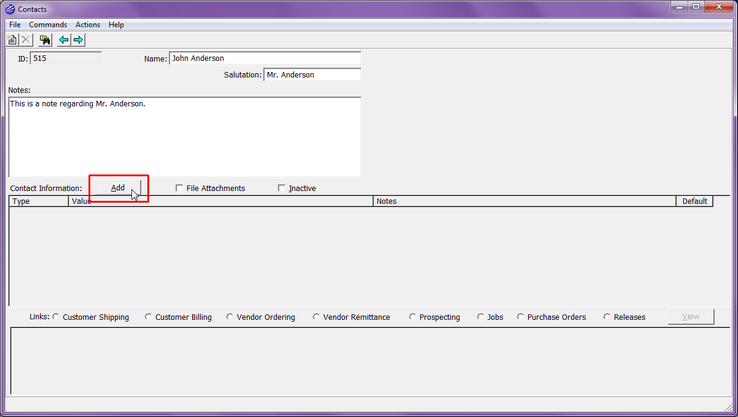
Enter a Salutation (ex. Mr. Anderson, John, Johnny, etc. ... however the contact prefers to be addressed). If there are any notes which are specific to this contact, enter them in the Notes field.
Click on the Add button.
This will open the Piece of Contact Information dialog box. Select the Type of information you would like to add, and enter the Value. Click on the Default checkbox. If you have multiple entries with the same Type selected, you will only be able to designate one of them as the default. For example, if you have 4 entries with the Type "Phone", you will only be able to make one of them the default phone number. If there are any notes related to this particular piece of contact information, you can enter it in the Notes field. Click OK.

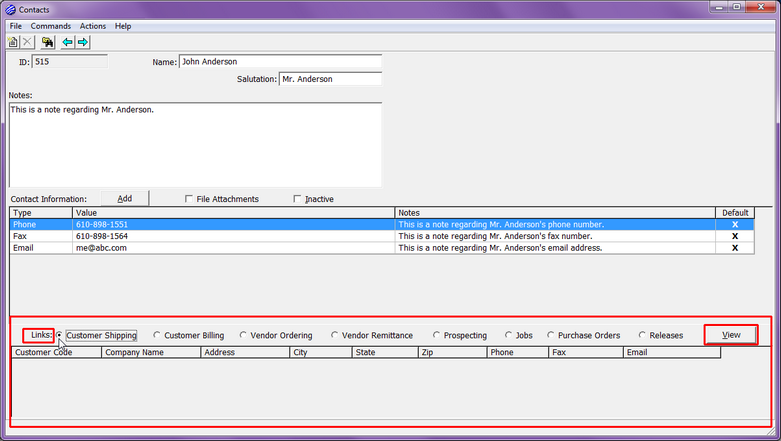
In the center of the screen, you can see the "pieces" that were added, along with their Type, Value, Notes, and Default setting. There is no limit to how many pieces you can add.
This contact can now be linked to any of the 8 following records: Customer Shipping, Customer Billing, Vendor Ordering, Vendor Remittance, Prospecting, Jobs, Purchase Orders, and Releases. These are shown in the Links portion of the screen. As an example, we will link this contact to an existing Customer Shipping record. Select Customer Shipping, and click on the View button.
Click on Commands > Find. Do a search, and double-click on the desired Customer Shipping record. In the Contacts section of the screen, you will see a button that states Add John Anderson. Click on the button.
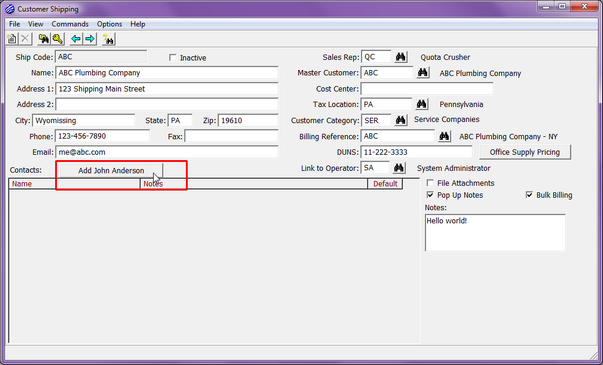
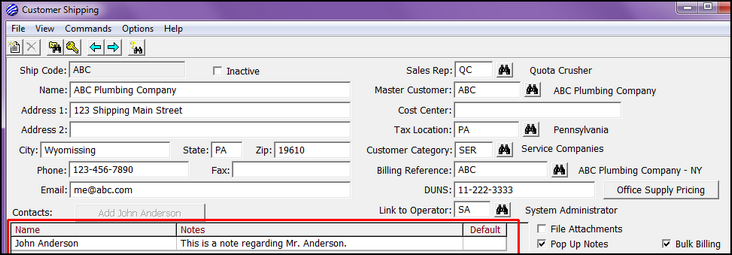
John Anderson has now been added as a contact on this Customer Shipping record.
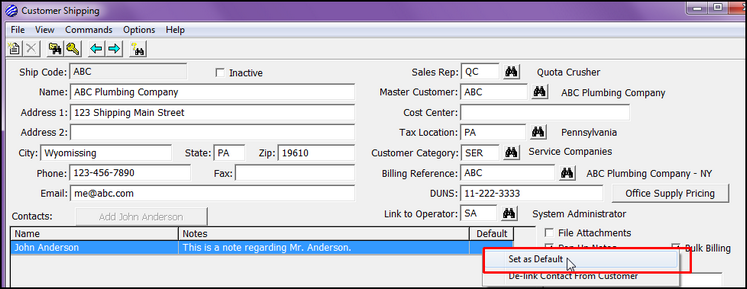
If you would like John to be the primary contact for this customer, right-click on his contact information, and click on Set as Default.
PLEASE NOTE: You can link an unlimited number of contacts to a record. Whether you have 1 contact or 50 contacts, it is highly recommended that you always select a default.
His name will now be displayed with an "X" in the Default column.
![]()
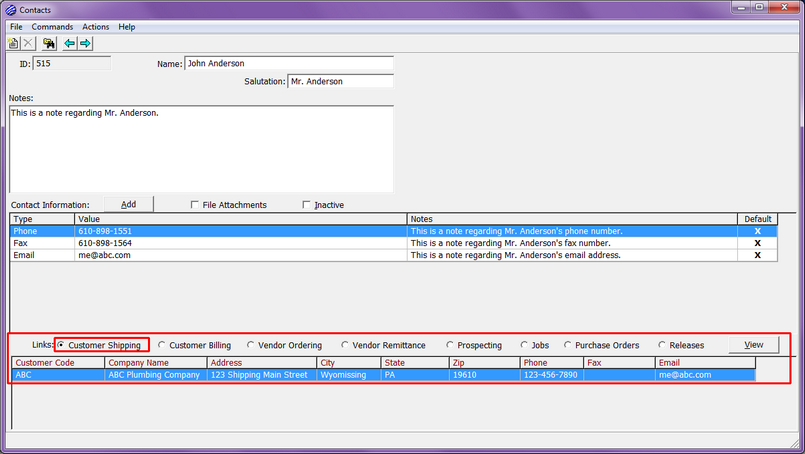
Close the Customer Shipping screen to return to the Contacts screen. John has been successfully linked to a Customer Shipping record, which you can see in the Links section of the screen. This contact can also be linked to the Customer Billing record, or any other record, by following the same steps.
From the Contacts screen, click Actions > Export Email Addresses

This feature allows you to generate a sortable list of all contact email addresses system-wide and export the list. The list columns include Email, Name, and Salutation. There will be only one row in the list for each unique email address. If the same email address is shared by multiple contact records, the unique names for each contact will be separated by commas in that row. The same logic applies to the salutation column. Each unique salutation linked to an email address will be separated by a comma. By default, the listing generated will include all email addresses within contact information, as well as email addresses that are directly on company records that link to a contact (customer shipping, customer billing, vendor ordering, vendor remittance, or prospect records).

If you want to limit your list to email addresses that appear within contact information only, you can check the Exclude linked company email addresses checkbox.
Click on the Export button. You will then be prompted to save the .txt file.

If a contact is not linked to any records (customer, vendor, or prospecting), you can click on the Inactive checkbox to remove them from your active list of contacts. It is not recommended that you delete contacts.
